#button onclick attribute html
Explore tagged Tumblr posts
Visit Tumblr Blog
Explore Tumblr blogs with no restrictions, modern design and the best experience.
Last Seen Tumblr Blogs


Fun Fact
Tumblr Inc. is funded by 13 investors.
Text
HTML Integration with CSS and JavaScript

Integrating HTML with CSS and JavaScript is fundamental to creating interactive and visually appealing web pages. Here’s how you can effectively combine these technologies.
1. HTML Integration with CSS
CSS (Cascading Style Sheets) is used to style HTML elements by controlling layout, colors, fonts, and more.
Inline CSS:
You can apply CSS styles directly to HTML elements using the style attribute.
Example:
<p style="color: blue; font-size: 18px;">This is a styled paragraph.</p>
Pros: Quick and easy for small styles.
Cons: Not reusable, and can clutter HTML code.
Internal CSS:
Internal CSS is defined within a <style> element inside the <head> section of an HTML document.
Example:
<head> <style> p { color: green; font-size: 20px; } </style> </head> <body> <p>This paragraph is styled with internal CSS.</p> </body>
Pros: Allows you to style a complete page in one place.
Cons: Styles are not reusable across multiple pages.
External CSS:
External CSS is stored in a separate .css file, which is linked to the HTML document using the <link> element.
Example:
<!-- Link to external CSS --> <head> <link rel="stylesheet" href="styles.css"> </head> <body> <p>This paragraph is styled with external CSS.</p> </body>
Pros: Separates style from content, making maintenance easier and styles reusable across multiple pages.
Cons: Requires additional HTTP requests to load the CSS file.
CSS Example:
External CSS file styles.css:
body { background-color: #f0f0f0; font-family: Arial, sans-serif; } p { color: #333; font-size: 18px; line-height: 1.6; }
HTML document linking to styles.css:
<head> <link rel="stylesheet" href="styles.css"> </head> <body> <p>This is a paragraph styled with an external CSS file.</p> </body>
2. HTML Integration with JavaScript
JavaScript is a programming language used to create interactive and dynamic web pages.
Inline JavaScript:
You can add JavaScript directly within an HTML element using the onclick, onload, and other event attributes.
Example:
<button onclick="alert('Button clicked!')">Click Me</button>
Pros: Quick for simple interactions.
Cons: Can make HTML code hard to maintain and is not best practice for larger projects.
Internal JavaScript:
Internal JavaScript is included within a <script> tag inside the <head> or <body> section of an HTML document.
Example:
<head> <script> function showMessage() { alert('Hello, World!'); } </script> </head> <body> <button onclick="showMessage()">Click Me</button> </body>
Pros: Keeps JavaScript separate from HTML, making the code more organized.
Cons: Code is still contained within the same HTML document, which can be less modular.
External JavaScript:
External JavaScript is stored in a separate .js file, which is linked to the HTML document using the <script> tag.
Example:
<!-- Link to external JavaScript --> <head> <script src="script.js"></script> </head> <body> <button onclick="showMessage()">Click Me</button> </body>
External JavaScript file script.js:
function showMessage() { alert('Hello, World!'); }
Pros: Keeps HTML, CSS, and JavaScript separate, making maintenance easier and code more reusable.
Cons: Requires additional HTTP requests to load the JavaScript file.
JavaScript Example:
External JavaScript file script.js:
document.addEventListener('DOMContentLoaded', function() { const button = document.querySelector('button'); button.addEventListener('click', function() { alert('Button clicked!'); }); });
HTML document linking to script.js:
<head> <script src="script.js" defer></script> </head> <body> <button>Click Me</button> </body>
Best Practices for Integration:
Keep Content, Presentation, and Behavior Separate: Use HTML for structure, CSS for styling, and JavaScript for behavior.
Minimize Inline CSS and JavaScript: For maintainability and scalability, avoid inline CSS and JavaScript.
Load JavaScript Asynchronously: Use defer or async attributes to prevent JavaScript from blocking page rendering.
Use External Files: Keep CSS and JavaScript in external files to improve maintainability and performance.
By following these practices, you can create well-structured, maintainable, and efficient web pages that provide a good user experience.
Read More…
0 notes
Text
The Ultimate Guide To Google Analytics Event Tracking

The Ultimate Guide To Google Analytics Event TrackingThis article will provide a comprehensive guide to understanding and implementing event tracking in Google Analytics, including its importance, how to set it up, and how to interpret the data it provides.
What is Event Tracking?
Event tracking is a powerful feature of Google Analytics that allows you to measure and track user interactions and engagement on your website or mobile app. It provides valuable insights into how users are interacting with your content, what actions they are taking, and how they are engaging with your website or app.By implementing event tracking, you can gain a deeper understanding of user behavior and optimize your website or app accordingly. It allows you to track specific actions, such as button clicks, link clicks, form submissions, video plays, and more. This data is crucial for making data-driven decisions to improve user experience, increase engagement, and achieve your business goals.Event tracking is especially important for measuring user interactions and engagement because it goes beyond traditional pageviews and session metrics. It provides a more granular view of user behavior, allowing you to track specific actions and events that are meaningful to your business. With event tracking, you can answer questions like: - Which buttons or links are users clicking on the most? - Which forms are being submitted? - Are users watching my videos? - How far are users scrolling on my pages? - First, log in to your Google Analytics account and navigate to the Admin section. - In the Admin section, select the property for which you want to set up event tracking. - Under the Property column, click on "Tracking Info" and then select "Event Tracking". - Next, click on the "New Event Tracking" button to create a new event tracking configuration. - In the event tracking configuration, you will need to define the category, action, label, and value for your event. These parameters will help you categorize and track different types of user interactions. - Once you have defined the event parameters, you will need to add the necessary code to your website or mobile app. This code will send the event data to Google Analytics for tracking. - For websites, you can add the event tracking code to the onclick attribute of your HTML elements, such as buttons or links. For mobile apps, you will need to use the appropriate SDK or API to send the event data. - After adding the code, make sure to test the event tracking implementation to ensure that the data is being sent correctly to Google Analytics. - Finally, once the event tracking is set up and the data is being collected, you can start analyzing the event data in Google Analytics. You can create custom reports, set up conversion goals based on events, and identify user behavior patterns to make data-driven decisions. - What is event tracking? Event tracking is a feature in Google Analytics that allows you to track specific user interactions or events on your website or mobile app. It helps you understand how users engage with your content, such as button clicks, link clicks, form submissions, video plays, and more. - Why is event tracking important? Event tracking is crucial for measuring user interactions and engagement on your website. It provides valuable insights into how users navigate through your site, which actions they take, and helps you optimize your website's performance and user experience based on data-driven decisions. - How do I set up event tracking in Google Analytics? To set up event tracking in Google Analytics, you need to add the necessary tracking code to your website or app. This code captures the event data and sends it to your Google Analytics account. You can then configure the tracking parameters and create custom reports to analyze the data. Detailed step-by-step instructions can be found in the article. - What can I track with event tracking? You can track various user interactions with event tracking, including button clicks, link clicks, form submissions, outbound links to other websites, file downloads, video plays, scroll depth, and more. The possibilities are extensive and can be tailored to your specific business goals and website requirements. - How can I interpret event tracking data? Interpreting event tracking data involves analyzing the collected data in Google Analytics. You can create custom reports to visualize the event data, set up conversion goals based on specific events, measure event conversions, and identify user behavior patterns. This information helps you make data-driven decisions to improve user experience, optimize your content strategy, and track key actions on your website. - Can I set up goals based on events? Yes, you can set up goals based on events in Google Analytics. By defining specific user interactions as goals, such as form submissions or video plays, you can track and measure the conversion rate of these events. This allows you to monitor the success of your website in achieving key actions and optimize accordingly. Read the full article
0 notes
Text
HTML button Tag
The HTML <button> tag is used to create a clickable button in HTML webpage.We can use button tag inside and outside of the HTML form.If we use button tag inside the form, it works as the submit button. We can also use it as reset button.In the Button tag We can add images, but we cannot do this with the input element. Syntax <button…
View On WordPress
#button#button html#button html code#button html link#button html onclick#button html tag link#button html tutorial#button html5#button in html#button in html and css#button in html to link to another page#button in html with link#button onclick attribute html#button tag#button tag in html#html button#html button tag#html button tag hindi urdu#tag button
0 notes
Link
JavaScript Introduction, JavaScript has multiple methods, one of which is the getElementById () method. JavaScript can change HTML style. JavaScript can change HTML attributes, Password show, Password Hide, , JavaScript getElementById method, JavaScript button, JavaScript onclick
#js password show#JavaScript Introduction#JavaScript Introductionbasic#javascript#getElementById () method#JavaScript onclick#JavaScript button#change HTML attributes#Password Hide
1 note
·
View note
Text
Button text html

Button text html how to#
Button text html pdf#
Button text html generator#
Button text html code#
Button text html Pc#
How Base64 encoding and decoding is done in node.The problem occurs if you try to change the text of a button more than once in the same session (using innerHTML).
Button text html Pc#
Note: The innerHTML method has a problem when run on Netscape 6.2 and 7.02 on the PC (and possibly other versions).
Node.js Image Upload, Processing and Resizing using Sharp package Changing html content using JavaScript and CSS.
Actions must be added to buttons using JavaScript or by associating the button with a form. No action takes place by default when a button is clicked. Any text appearing between the opening and closing tags will appear as text on the button. • Upload and Retrieve Image on MongoDB using Mongoose The element is used to create an HTML button.
Button text html how to#
How to Upload File using formidable module in Node.js ?.
Button text html pdf#
How to display a PDF as an image in React app using URL?.
How React Native Make Mobile App Development Simpler?.
Getting started with React Native? Read this first !.
How to change the text and image by just clicking a button in JavaScript ?.
How to change an input button image using CSS?.
It specifies a link on the web page or a place on the same page where the user navigates after clicking on the link. A href attribute is the required attribute of the tag.
ISRO CS Syllabus for Scientist/Engineer Exam Add a link styled as a button with CSS properties. W3Schools offers free online tutorials, references and exercises in all the major languages of the web.This input can be converted to a toggle button. In web development, an HTML radio (or checkbox) input is used to get true and false value on checked and unchecked events respectively. Basic button and input style The height and vertical alignment of buttons and inputs is determined by the combination of borders, padding, font-size, and line-height. ISRO CS Original Papers and Official Keys A toggle button is a visual element of the user interface that is used to switch between two (true/false) state.GATE CS Original Papers and Official Keys.
Button text html code#
And finally, if you override one of these class names by including the generated css code on your website, everything should work fine as expected. the complete page is loaded, then the anonymous function denoted by function HTML Tutorial » HTML Button onClick. (Perfect for horizontal navigation menus) w3-block. A horizontal bar that can be used to group buttons together. Default color is inherited from parent element in version 4. Default color is light-gray in W3.CSS version 3. Let's say if you enter "btn-primary", the code will generate the css code with this class name. A rectangular button with a gray hover effect. As you know a bootstrap button has css class names like btn-primary, btn-secondary etc. In order to include a button on a Bootstrap website, you just need to enter one of the class names listed on the Bootstrap documentation to the "class name" field under the text settings. Can I use these buttons on Twitter bootstrap? This kind of tasks are out of the button generator's scope. On the other hand, if your button needs to perform an action, let's say an ajax request, then you have to write that piece of code. You only need to include generated CSS and HTML codes to render the button. Do I need to include any javascript or jQuery code on my website?Ībsolutely no. All modern browsers should render your css button properly. To do this, just uncheck the "prefix" checkbox above the generated css code. Covering popular subjects like HTML, CSS, JavaScript, Python, SQL, Java, and many, many more. You can also disable vendor prefixes to get a cleaner code. W3Schools offers free online tutorials, references and exercises in all the major languages of the web. The generated code will include vendor prefixes for following browsers Google Chrome, Firefox, Safari, Opera, Internet Explorer and Edge. In addition to this properties, you can also change button's text and class name. Which CSS properties are available for editing? After completing your css button, click on the button preview or "Get Code" button to view generated CSS and HTML codes. Just select a css button from the library and play its css styles.
Button text html generator#
This css button generator is a free online tool that allows you to create cross browser css button styles in seconds.
0 notes
Text
Recreating the Google Search Results Page
An Odin Project Challenge

From The Outset
I knew this would be a tedious process. It turns out, I was correct. While working on this challenge, I hammered out plenty of nesting and styling fundamentals. But, of more importance, throughout this build I got the opportunity to coast with the demands of HTML and CSS (meaning: I was simply reinforcing prior lessons learned.) This tempo of structuring and styling allowed me to think more freely about the behavior of certain elements — I was finally able to begin integrating JavaScript to create solutions. The subsequent paragraphs will administer some brief detail.
CSS: A Molehill and Mountain
When a Google Search Results page is produced (these days,) there are supplemental elements involved which aid any given search (by way of: ‘People also search for/ask’.) Each of these lists suggest multiple topics, websites and companies which may better address the initial query.
Typically, these references are housed by a border surrounding all sides. This border brings me to my first obstacle. And while solving this problem was quick and straightforward, I believe the answer I found will regularly come in handy down the road.
My issue presented as a parent element with a border which had gaps in the corners. And I intended there only to be a solid, continuous border.
When nesting siblings within a bordered-parent-element, the borders of the children need also be taken into account. Put simply: if there is styling for rounded border radius around all children — and those children have standard squared border radius — then the border corners of the outer children will create visual gaps (interrupting the integrity of the parent border.)
So this was an easy tweak. I altered the border radius of my outer children elements, such as to make both parent and child borders uniform. Then, my problem was resolved.
The second new CSS maneuver I utilized cured a great deal of stress. Attempting to clone the Google Search Results page means placing a waffle-menu icon paired with a sign-in button in the top right of the page.
I was under the assumption that by using a relatively-positioned parent and absolutely-positioned descendent, that my work would be done. I was very wrong.
See, by following this procedure, my coupling of elements in the top-right corner continued to stay fixed to the viewport edge. Problematic, for sure. The rest of the page moved together (when resizing the screen) while the waffle and sign-in kept glued to the side of the screen, leading to overlapping and clashing with all the other elements.
This was the most frustrating encounter during the whole project. I really didn’t understand what my mistake was (at first.) Admittedly, I kept shuffling the nesting of all navigation elements; thinking surely I just need to figure out the particular wrapper which will allow me to adjust positioning. It wasn’t the proper perspective. At all.
Eventually I realized how to frame my question and set off, thumbing through page after page of Google results. The answer was nauseatingly apparent when I stumbled into the concept of setting a minimal width for my containing div.
That was it! A minimal width would keep my elements from bleeding into my other elements at a lower viewport size, while allowing them to stretch with the screen as it grew. And so it was.
Toggling with JavaScript
One of the aforementioned sections (‘People also ask’) bears an X in the upper right corner, as a way for the user to collapse and remove the element from the flow of the page.
I first placed a button and span (housing the X) inside a div, wrapped by the parent element. This let me use CSS to position the X in its appropriate corner with the button stacked over top.
The button was then assigned an onmousedown event with a called function (closeBox); this would trigger my function when the mouse was actively pressed atop the button and perceivably on the underlying X.
In my JavaScript file, I defined the (closeBox) function and created an instance for my element id. By doing so, my html element in question could be manipulated by way of pressing down a mouse over the button.
Lastly, I used an if else statement to make the section display none when the button was pressed onmousedown.
In the remaining two sections of suggestions, each topic listed extends with a type of card which supplies more information. These topic headings are fit with their own chevrons, so as to invert and point up/down (respectively) determined by whether the card of info is actively being shown or not.
I knew the behavior needed to occur when each topic heading was clicked. So in my HTML file, I called a function (arrowOneTogg) with the onclick event attribute.
Using CSS, I created a class to transform and rotate my chevrons 180deg, ultimately making them point from down to up (and toggle back and forth with every click.)
Back in my JavaScript file, I defined the function. After which, I used const to create an instance for all of my individual spans (the spans which allowed me to add the initial chevrons).
I then wrote statements so as to refer to each variable and target classList, toggling the (rotateChev) class in order to rotate the specific chevrons onclick.
Conclusion
That’s that. I certainly didn’t want to spend much time on this HTML and CSS, but I did. However, as I press on, my chops get a bit more sharpened and the obvious pitfalls are more effectively avoided.
All things considered, I am pleased to have built my first solo JavaScript functions. The confidence is undeniable in comparison to having absolutely zero experience in this practice. Now, enough talking and onto the next project.
https://permalik.github.io/google-search-results-page
0 notes
Text
HTML APIs

HTML APIs (Application Programming Interfaces) provide a way for developers to interact with web browsers to perform various tasks, such as manipulating documents, handling multimedia, or managing user input. These APIs are built into modern browsers and allow you to enhance the functionality of your web applications.
Here are some commonly used HTML APIs:
1. Geolocation API
Purpose: The Geolocation API allows you to retrieve the geographic location of the user’s device (with their permission).
Key Methods:
navigator.geolocation.getCurrentPosition(): Gets the current position of the user.
navigator.geolocation.watchPosition(): Tracks the user’s location as it changes.
Example: Getting the user’s current location.<button onclick="getLocation()">Get Location</button> <p id="location"></p><script> function getLocation() { if (navigator.geolocation) { navigator.geolocation.getCurrentPosition(showPosition); } else { document.getElementById('location').innerHTML = "Geolocation is not supported by this browser."; } } function showPosition(position) { document.getElementById('location').innerHTML = "Latitude: " + position.coords.latitude + "<br>Longitude: " + position.coords.longitude; } </script>
2. Canvas API
Purpose: The Canvas API allows for dynamic, scriptable rendering of 2D shapes and bitmap images. It’s useful for creating graphics, games, and visualizations.
Key Methods:
getContext('2d'): Returns a drawing context on the canvas, or null if the context identifier is not supported.
fillRect(x, y, width, height): Draws a filled rectangle.
clearRect(x, y, width, height): Clears the specified rectangular area, making it fully transparent.
Example: Drawing a rectangle on a canvas.<canvas id="myCanvas" width="200" height="100"></canvas><script> var canvas = document.getElementById('myCanvas'); var ctx = canvas.getContext('2d'); ctx.fillStyle = "red"; ctx.fillRect(20, 20, 150, 100); </script>
3. Drag and Drop API
Purpose: The Drag and Drop API allows you to implement drag-and-drop functionality on web pages, which can be used for things like moving elements around or uploading files.
Key Methods:
draggable: An HTML attribute that makes an element draggable.
ondragstart: Event triggered when a drag operation starts.
ondrop: Event triggered when the dragged item is dropped.
Example: Simple drag and drop.<p>Drag the image into the box:</p> <img id="drag1" src="image.jpg" draggable="true" ondragstart="drag(event)" width="200"> <div id="dropzone" ondrop="drop(event)" ondragover="allowDrop(event)" style="width:350px;height:70px;padding:10px;border:1px solid #aaaaaa;"></div><script> function allowDrop(ev) { ev.preventDefault(); } function drag(ev) { ev.dataTransfer.setData("text", ev.target.id); } function drop(ev) { ev.preventDefault(); var data = ev.dataTransfer.getData("text"); ev.target.appendChild(document.getElementById(data)); } </script>
4. Web Storage API
Purpose: The Web Storage API allows you to store data in the browser for later use. It includes localStorage for persistent data and sessionStorage for data that is cleared when the page session ends.
Key Methods:
localStorage.setItem(key, value): Stores a key/value pair.
localStorage.getItem(key): Retrieves the value for a given key.
sessionStorage.setItem(key, value): Stores data for the duration of the page session.
Example: Storing and retrieving a value using localStorage.<button onclick="storeData()">Store Data</button> <button onclick="retrieveData()">Retrieve Data</button> <p id="output"></p><script> function storeData() { localStorage.setItem("name", "John Doe"); } function retrieveData() { var name = localStorage.getItem("name"); document.getElementById("output").innerHTML = name; } </script>
5. Fetch API
Purpose: The Fetch API provides a modern, promise-based interface for making HTTP requests. It replaces older techniques like XMLHttpRequest.
Key Methods:
fetch(url): Makes a network request to the specified URL and returns a promise that resolves to the response.
Example: Fetching data from an API.<button onclick="fetchData()">Fetch Data</button> <p id="data"></p><script> function fetchData() { fetch('https://jsonplaceholder.typicode.com/posts/1') .then(response => response.json()) .then(data => { document.getElementById('data').innerHTML = data.title; }); } </script>
6. Web Workers API
Purpose: The Web Workers API allows you to run scripts in background threads. This is useful for performing CPU-intensive tasks without blocking the user interface.
Key Methods:
new Worker('worker.js'): Creates a new web worker.
postMessage(data): Sends data to the worker.
onmessage: Event handler for receiving messages from the worker.
Example: Simple Web Worker.<script> if (window.Worker) { var myWorker = new Worker('worker.js'); myWorker.postMessage('Hello, worker!'); myWorker.onmessage = function(e) { document.getElementById('output').innerHTML = e.data; }; } </script> <p id="output"></p>
worker.js:onmessage = function(e) { postMessage('Worker says: ' + e.data); };
7. WebSocket API
Purpose: The WebSocket API allows for interactive communication sessions between the user’s browser and a server. This is useful for real-time applications like chat applications, live updates, etc.
Key Methods:
new WebSocket(url): Opens a WebSocket connection.
send(data): Sends data through the WebSocket connection.
onmessage: Event handler for receiving messages.
Example: Connecting to a WebSocket.<script> var socket = new WebSocket('wss://example.com/socket'); socket.onopen = function() { socket.send('Hello Server!'); }; socket.onmessage = function(event) { console.log('Message from server: ', event.data); }; </script>
8. Notifications API
Purpose: The Notifications API allows web applications to send notifications to the user, even when the web page is not in focus.
Key Methods:
Notification.requestPermission(): Requests permission from the user to send notifications.
new Notification(title, options): Creates and shows a notification.
Example: Sending a notification.<button onclick="sendNotification()">Notify Me</button><script> function sendNotification() { if (Notification.permission === 'granted') { new Notification('Hello! This is a notification.'); } else if (Notification.permission !== 'denied') { Notification.requestPermission().then(permission => { if (permission === 'granted') { new Notification('Hello! This is a notification.'); } }); } } </script>
HTML APIs allow you to build rich, interactive web applications by providing access to browser features and capabilities. These APIs are widely supported across modern browsers, making them a vital part of contemporary web development.
Read More…
0 notes
Text
What Is Internal linking | Internal Links for SEO
What Is Internal Linking - Internal Links Impact On SEO With Example
Hey guys. today, we're talking about What Is internal links and internal linking in html. So what is internal links? They're simply links on your page that link to anything on your own site, so that's pages on your own domain.
And I say "domain," so not subdomain, but the same domain. Anytime you link to yourself, that's simply just called an internal link.
It's just the official term for something you probably already know and are probably already doing.
An important thing to note-- that internal links are not just links inside of your post content. So if you're writing a blog post, and you have a few links there, you have way more links on your actual page, right-- everything in your navigation, your header, your footer, your sidebar.
When we're saying "internal links," every one of those links count. I'm going to refer back to this a few times. So it's important to remember, when you're thinking internal links, not just when you're writing a post, think about internal links across your entire site.

Internal Links For SEO
So we're going to give a little more of a brief overview here. So when it comes to what you should be linking to, I want you to use anchor text as your guideline.
And there's a reason why. Anchor text is incredibly important. You remember, when you link to something, the link text should be basically what the key phrase of the page you are linking to.
All right, so why am I saying use anchor text as your guide? So whenever you're going to write a post, now when you're linking to something, I'm only letting you use the anchor text when you link to it.
You can't use cheats like "click here" or linking on paragraphs or images or anything else. You can only link on anchor text.
And if you're using that as your guide, you're only going to link to things that are contextually relevant to that post. That's super important.
In Google's Webmaster Guidelines, they basically tell you, only link to things that are a good user experience or useful for the user to use for navigation.
So that is going to be your guideline here. You're not just linking to things, because you want to rank on them.
You're linking to things, because you think they're going to be useful for your user. They fit into the context of what you are writing. I mean that's also a super important thing to know.
Google is a contextual search engine. It's using things like natural language processing. It's improving all the time. It's going to learn just as much about a link from the text around your link as the anchor text itself.
So it's really important, as you are writing, that you are organically linking the things. You're not faking it for the sole purpose of getting that anchor text or that link into another post.
If you're using that as your guideline, you'll pretty much be able to figure out what you should be linking to, and it will be organic within that post, and you'll be OK.
Internal linking SEO Best Practice - too many internal links
So how many links or internal links should you aim for in a given post? So again, remember, internal links count everything on your page, so it's actually a good thing to link as too many internal links as you can, because you want to outweight kind of all that navigation bloat you're going to end up having.
In your navigation, you'll probably have tons of links, so out the gate, you probably have 20, 30 links counting against that page rank you're distributing out. Get as many into your internal post as you can. There's like an age old number that people use to toss around.
You could have a maximum of 100 links per page. That's because Google said that-- I don't know-- like 10 years ago when their algorithm and their computers were, you know, not as complex as they are today. Since then, if you read the webmaster guidelines, Google says you can have thousands of links on a page.
I promise you, even in a 5,000-word blog post, you will never hit Google's upper limits. So you cannot link enough, especially if you're following our guidelines that we said before.
Make sure you're only linking on anchor text and within text. I'm going to throw another guideline in for you. Space out your links.
we recommend using short web-friendly paragraph, so one the two sentences per paragraph. not just for usability, but make sure you're breaking up your paragraphs-- again, one to two sentences.
If you're following that, one to two links per each of those paragraphs, and you'll be OK. You're going to get a lot of texts around there to give Google that contextual stuff they love, and you'll make sure it's a good user experience, because you didn't over stuff with links. And therefore, you will never hit the upper limits of Google.
And remember, that thing that we told you out with page rank. In the back of your mind, remember every link is something that you are voting for.
So don't link to things that you don't want to rank. There are exceptions to that, obviously. For legal reasons, you might need to link to a terms of service or a privacy policy.
For business reasons, you might need to link to your About Us page. There are going to be exceptions that are pages that you won't rank for that you will need to link to. Whenever possible, only link to things that you want to rank on and are good for the user experience.
So along those lines, when you go to your site navigation, your whole theme, and your footer and everywhere around it, clean up your links.
Get rid of any links that you don't need for that user experience. If you're linking to something for the sole purpose of, I wanted to fill up my sidebar, kill those links.
I want to fill up my nav bar. No, that's not a good user experience. Only link to things that you want to rank on or that you think the user needs in that experience, because remember, all of those links are weighing you down when it comes to your ability to pass your page rank around. Clean it up.
Time for a little spring cleaning on those links. All right, this is kind of more of an Eric thing, but don't link to the same page twice. You can't vote for something twice. If you link to it four or five, six times, Google isn't giving you six votes for that. You only get one vote, and it's not a great user experience in general.
Internal linking in html
Linking to something multiple times, unless you absolutely need to for that user experience, cut the links out. Link the first time-- generally the best.
Second, time, third time, whatever you think is the best for the user experience -- if you use the anchor text 30 times on a post, and you're like, oh, man, there's 30 chances to link to that thing, no. Link once.
You're just kind of wasting your page rank. Again, not a great user experience. All right, so last thing is kind of more of a technical thing, and that's how you can link to yourself internally.
So Google recommends always linking on plain text whenever possible in the webmaster guidelines. So what that means is just using a plain old a tag or a HREF in the attribute.
Don't do things like JavaScript, or you do like an onclick. Don't do buttons. Don't do even images when you can. Obviously, for your logo, it's probably going to be an image that links.
That's OK. Just make sure in those cases, you use good alt text. Whenever you can, link on plain text. It's a better user experience. Again, remember when users are browsing quickly, they want to be able to easily see what they're linking to. You have accessibility issues if you're using a lot of images for your links.
And again, Google is flat out telling you, link on text. So please link on text whenever you can. There are some obvious reasons you might need to use JavaScript to generate your links, if you have, like, what's called a single page app.
There are exceptions to this, but if you're writing a blog post, and you're on WordPress, none of those exceptions apply to you. So use plain text links when you can. And that is pretty much our whole topic on internal links.
And again, we're going to come back to a lot more on the site structure stuff, how you should be worrying about silos and cornerstone content and so much more exciting stuff to talk about with internal links.
This is important stuff to remember as we go through all those future segments. This tool Internal linking Checker tool Helps You To Check Internal Links in blog posts.
Conclusion
So, in this article i have given information What Is Internal linking, Internal Links for SEO and Internal Links In Html. If you like this Article then do share it on Social Media.
Also Read This
Godaddy Domain not working without www In Blogger | Solution
Wordpress Top 5 Security Plugins | Make Wordpress Site Secure
What Is Internal linking | Internal Links for SEO SEO Tips via exercisesfatburnig.blogspot.com https://ift.tt/2FOBa4M
0 notes
Text
30 HTML Best Practices for Beginners
The most difficult aspect of running Nettuts+ is accounting for so many different skill levels. If we post too many advanced tutorials, our beginner audience won't benefit. The same holds true for the opposite. We do our best, but always feel free to pipe in if you feel you're being neglected. This site is for you, so speak up! With that said, today's tutorial is specifically for those who are just diving into web development. If you've one year of experience or less, hopefully some of the tips listed here will help you to become better, quicker!
You may also want to check out some of the HTML builders on Envato Market, such as the popular VSBuilder, which lets you generate the HTML and CSS for building your websites automatically by choosing options from a simple interface.
Or you can have your website built from scratch by a professional developer on Envato Studio who knows and follows all the HTML best practices.

Without further ado, let's review 30 best practices to observe when creating your markup.
1: Always Close Your Tags Back in the day, it wasn't uncommon to see things like this:
1 <li>Some text here. 2 <li>Some new text here. 3 <li>You get the idea. Notice how the wrapping UL/OL tag was omitted. Additionally, many chose to leave off the closing LI tags as well. By today's standards, this is simply bad practice and should be 100% avoided. Always, always close your tags. Otherwise, you'll encounter validation and glitch issues at every turn.
Better 1 <ul> 2 <li>Some text here. </li> 3 <li>Some new text here. </li> 4 <li>You get the idea. </li> 5 </ul> 2: Declare the Correct DocType

When I was younger, I participated quite a bit in CSS forums. Whenever a user had an issue, before we would look at their situation, they HAD to perform two things first:
Validate the CSS file. Fix any necessary errors. Add a doctype. "The DOCTYPE goes before the opening html tag at the top of the page and tells the browser whether the page contains HTML, XHTML, or a mix of both, so that it can correctly interpret the markup."
Most of us choose between four different doctypes when creating new websites.
http://www.w3.org/TR/html4/strict.dtd">
http://www.w3.org/TR/html4/loose.dtd">
http://www.w3.org/TR/xhtml1/DTD/xhtml1-transitional.dtd">
http://www.w3.org/TR/xhtml1/DTD/xhtml1-strict.dtd">
There's a big debate currently going on about the correct choice here. At one point, it was considered to be best practice to use the XHTML Strict version. However, after some research, it was realized that most browsers revert back to regular HTML when interpretting it. For that reason, many have chosen to use HTML 4.01 Strict instead. The bottom line is that any of these will keep you in check. Do some research and make up your own mind.
3: Never Use Inline Styles When you're hard at work on your markup, sometimes it can be tempting to take the easy route and sneak in a bit of styling.
1 <p style="color: red;">I'm going to make this text red so that it really stands out and makes people take notice! </p> Sure -- it looks harmless enough. However, this points to an error in your coding practices.
When creating your markup, don't even think about the styling yet. You only begin adding styles once the page has been completely coded. It's like crossing the streams in Ghostbusters. It's just not a good idea. -Chris Coyier (in reference to something completely unrelated.)
Instead, finish your markup, and then reference that P tag from your external stylesheet.
Better 1 #someElement > p { 2 color: red; 3 } 4: Place all External CSS Files Within the Head Tag Technically, you can place stylesheets anywhere you like. However, the HTML specification recommends that they be placed within the document HEAD tag. The primary benefit is that your pages will seemingly load faster.
While researching performance at Yahoo!, we discovered that moving stylesheets to the document HEAD makes pages appear to be loading faster. This is because putting stylesheets in the HEAD allows the page to render progressively. - ySlow Team
1 <head> 2 <title>My Favorites Kinds of Corn</title> 3 <link rel="stylesheet" type="text/css" media="screen" href="path/to/file.css" /> 4 <link rel="stylesheet" type="text/css" media="screen" href="path/to
/anotherFile.css" />
5 </head> 5: Consider Placing Javascript Files at the Bottom Place JS at bottom Remember -- the primary goal is to make the page load as quickly as possible for the user. When loading a script, the browser can't continue on until the entire file has been loaded. Thus, the user will have to wait longer before noticing any progress.
If you have JS files whose only purpose is to add functionality -- for example, after a button is clicked -- go ahead and place those files at the bottom, just before the closing body tag. This is absolutely a best practice.
Better
<p>And now you know my favorite kinds of corn. </p>
<script type="text/javascript" src="path/to/file.js"></script>
<script type="text/javascript" src="path/to/anotherFile.js"></script>
</body>
</html>
6: Never Use Inline Javascript. It's not 1996! Another common practice years ago was to place JS commands directly within tags. This was very common with simple image galleries. Essentially, a "onclick" attribute was appended to the tag. The value would then be equal to some JS procedure. Needless to say, you should never, ever do this. Instead, transfer this code to an external JS file and use "addEventListener/attachEvent" to "listen" for your desired event. Or, if using a framework like jQuery, just use the "click" method.
$('a#moreCornInfoLink').click(function() { alert('Want to learn more about corn?'); }); 7: Validate Continuously validate continuously I recently blogged about how the idea of validation has been completely misconstrued by those who don't completely understand its purpose. As I mention in the article, "validation should work for you, not against."
However, especially when first getting started, I highly recommend that you download the Web Developer Toolbar and use the "Validate HTML" and "Validate CSS" options continuously. While CSS is a somewhat easy to language to learn, it can also make you tear your hair out. As you'll find, many times, it's your shabby markup that's causing that strange whitespace issue on the page. Validate, validate, validate.
8: Download Firebug download firebug I can't recommend this one enough. Firebug is, without doubt, the best plugin you'll ever use when creating websites. Not only does it provide incredible Javascript debugging, but you'll also learn how to pinpoint which elements are inheriting that extra padding that you were unaware of. Download it!
9: Use Firebug! use firebug From my experiences, many users only take advantage of about 20% of Firebug's capabilities. You're truly doing yourself a disservice. Take a couple hours and scour the web for every worthy tutorial you can find on the subject.
Resources Overview of Firebug Debug Javascript With Firebug - video tutorial 10: Keep Your Tag Names Lowercase Technically, you can get away with capitalizing your tag names.
<DIV>
<P>Here's an interesting fact about corn. </P>
</DIV>
Having said that, please don't. It serves no purpose and hurts my eyes -- not to mention the fact that it reminds me of Microsoft Word's html function!
Better
<div>
<p>Here's an interesting fact about corn. </p>
</div>
11: Use H1 - H6 Tags Admittedly, this is something I tend to slack on. It's best practice to use all six of these tags. If I'm honest, I usually only implement the top four; but I'm working on it! :) For semantic and SEO reasons, force yourself to replace that P tag with an H6 when appropriate.
1 2 <h1>This is a really important corn fact! </h1> <h6>Small, but still significant corn fact goes here. </h6> 12: If Building a Blog, Save the H1 for the Article Title h1 saved for title of article Just this morning, on Twitter, I asked our followers whether they felt it was smartest to place the H1 tag as the logo, or to instead use it as the article's title. Around 80% of the returned tweets were in favor of the latter method.
As with anything, determine what's best for your own website. However, if building a blog, I'd recommend that you save your H1 tags for your article title. For SEO purposes, this is a better practice - in my opinion.
13: Download ySlow
download yslow Especially in the last few years, the Yahoo team has been doing some really great work in our field. Not too long ago, they released an extension for Firebug called ySlow. When activated, it will analyze the given website and return a "report card" of sorts which details the areas where your site needs improvement. It can be a bit harsh, but it's all for the greater good. I highly recommend it.
14: Wrap Navigation with an Unordered List Wrap navigation with unordered lists Each and every website has a navigation section of some sort. While you can definitely get away with formatting it like so:
<div id="nav"> <a href="#">Home </a> <a href="#">About </a> <a href="#">Contact </a> </div> I'd encourage you not to use this method, for semantic reasons. Your job is to write the best possible code that you're capable of.
Why would we style a list of navigation links with anything other than an unordered LIST?
The UL tag is meant to contain a list of items.
Better <ul id="nav"> <li><a href="#">Home</a></li> <li><a href="#">About</a></li> <li><a href="#">Contact</a></li> </ul> 15: Learn How to Target IE You'll undoubtedly find yourself screaming at IE during some point or another. It's actually become a bonding experience for the community. When I read on Twitter how one of my buddies is battling the forces of IE, I just smile and think, "I know how you feel, pal."
The first step, once you've completed your primary CSS file, is to create a unique "ie.css" file. You can then reference it only for IE by using the following code.
<!--[if lt IE 7]> <link rel="stylesheet" type="text/css" media="screen" href="path/to/ie.css" /> <![endif]--> This code says, "If the user's browser is Internet Explorer 6 or lower, import this stylesheet. Otherwise, do nothing." If you need to compensate for IE7 as well, simply replace "lt" with "lte" (less than or equal to).
16: Choose a Great Code Editor choose a great code editor Whether you're on Windows or a Mac, there are plenty of fantastic code editors that will work wonderfully for you. Personally, I have a Mac and PC side-by-side that I use throughout my day. As a result, I've developed a pretty good knowledge of what's available. Here are my top choices/recommendations in order:
Mac Lovers Coda Espresso TextMate Aptana DreamWeaver CS4 PC Lovers InType E-Text Editor Notepad++ Aptana Dreamweaver CS4 17: Once the Website is Complete, Compress! Compress By zipping your CSS and Javascript files, you can reduce the size of each file by a substantial 25% or so. Please don't bother doing this while still in development. However, once the site is, more-or-less, complete, utilize a few online compression programs to save yourself some bandwidth.
Javascript Compression Services Javascript Compressor JS Compressor CSS Compression Services CSS Optimiser CSS Compressor Clean CSS 18: Cut, Cut, Cut cut cut cut Looking back on my first website, I must have had a SEVERE case of divitis. Your natural instinct is to safely wrap each paragraph with a div, and then wrap it with one more div for good measure. As you'll quickly learn, this is highly inefficient.
Once you've completed your markup, go over it two more times and find ways to reduce the number of elements on the page. Does that UL really need its own wrapping div? I think not.
Just as the key to writing is to "cut, cut, cut," the same holds true for your markup.
19: All Images Require "Alt" Attributes It's easy to ignore the necessity for alt attributes within image tags. Nevertheless, it's very important, for accessibility and validation reasons, that you take an extra moment to fill these sections in.
Bad 1 <IMG SRC="cornImage.jpg" /> Better 1 <img src="cornImage.jpg" alt="A corn field I visited." /> 20: Stay up Late I highly doubt that I'm the only one who, at one point while learning, looked up and realized that I was in a pitch-dark room well into the early, early morning. If you've found yourself in a similar situation, rest assured that you've chosen the right field.
The amazing "AHHA" moments, at least for me, always occur late at night. This was the case when I first began to understand exactly what Javascript closures were. It's a great feeling that you need to experience, if you haven't already.
21: View Source view source What better way to learn HTML than to copy your heroes? Initially, we're all copiers! Then slowly, you begin to develop your own styles/methods. So visit the websites of those you respect. How did they code this and that section? Learn and copy from them. We all did it, and you should too. (Don't steal the design; just learn from the coding style.)
Notice any cool Javascript effects that you'd like to learn? It's likely that he's using a plugin to accomplish the effect. View the source and search the HEAD tag for the name of the script. Then Google it and implement it into your own site! Yay.
22: Style ALL Elements This best practice is especially true when designing for clients. Just because you haven't use a blockquote doesn't mean that the client won't. Never use ordered lists? That doesn't mean he won't! Do yourself a service and create a special page specifically to show off the styling of every element: ul, ol, p, h1-h6, blockquotes, etc.
23: Use Twitter Use Twitter Lately, I can't turn on the TV without hearing a reference to Twitter; it's really become rather obnoxious. I don't have a desire to listen to Larry King advertise his Twitter account - which we all know he doesn't manually update. Yay for assistants! Also, how many moms signed up for accounts after Oprah's approval? We can only long for the day when it was just a few of us who were aware of the service and its "water cooler" potential.
Initially, the idea behind Twitter was to post "what you were doing." Though this still holds true to a small extent, it's become much more of a networking tool in our industry. If a web dev writer that I admire posts a link to an article he found interesting, you better believe that I'm going to check it out as well - and you should too! This is the reason why sites like Digg are quickly becoming more and more nervous.
Twitter Snippet If you just signed up, don't forget to follow us: NETTUTS.
24: Learn Photoshop Learn Photoshop A recent commenter on Nettuts+ attacked us for posting a few recommendations from Psdtuts+. He argued that Photoshop tutorials have no business on a web development blog. I'm not sure about him, but Photoshop is open pretty much 24/7 on my computer.
In fact, Photoshop may very well become the more important tool you have. Once you've learned HTML and CSS, I would personally recommend that you then learn as many Photoshop techniques as possible.
Visit the Videos section at Psdtuts+ Fork over $25 to sign up for a one-month membership to Lynda.com. Watch every video you can find. Enjoy the "You Suck at Photoshop" series. Take a few hours to memorize as many PS keyboard shortcuts as you can. 25: Learn Each HTML Tag There are literally dozens of HTML tags that you won't come across every day. Nevertheless, that doesn't mean you shouldn't learn them! Are you familiar with the "abbr" tag? What about "cite"? These two alone deserve a spot in your tool-chest. Learn all of them!
By the way, in case you're unfamiliar with the two listed above:
abbr does pretty much what you'd expect. It refers to an abbreviation. "Blvd" could be wrapped in a <abbr> tag because it's an abbreviation for "boulevard". cite is used to reference the title of some work. For example, if you reference this article on your own blog, you could put "30 HTML Best Practices for Beginners" within a <cite> tag. Note that it shouldn't be used to reference the author of a quote. This is a common misconception. 26: Participate in the Community Just as sites like ours contributes greatly to further a web developer's knowledge, you should too! Finally figured out how to float your elements correctly? Make a blog posting to teach others how. There will always be those with less experience than you. Not only will you be contributing to the community, but you'll also teach yourself. Ever notice how you don't truly understand something until you're forced to teach it?
27: Use a CSS Reset This is another area that's been debated to death. CSS resets: to use or not to use; that is the question. If I were to offer my own personal advice, I'd 100% recommend that you create your own reset file. Begin by downloading a popular one, like Eric Meyer's, and then slowly, as you learn more, begin to modify it into your own. If you don't do this, you won't truly understand why your list items are receiving that extra bit of padding when you didn't specify it anywhere in your CSS file. Save yourself the anger and reset everything! This one should get you started.
html, body, div, span, h1, h2, h3, h4, h5, h6, p, blockquote, pre, a, abbr, acronym, address, big, cite, code, img, ins, kbd, q, s, samp, small, strike, strong, dl, dt, dd, ol, ul, li, fieldset, form, label, legend, table, caption, tbody, tfoot, thead, tr, th, td { margin: 0; padding: 0; border: 0; outline: 0; font-size: 100%; vertical-align: baseline; background: transparent; } body { line-height: 1; } ol, ul { list-style: none; } blockquote, q { quotes: none; } blockquote:before, blockquote:after, q:before, q:after { content: ''; content: none; }
table { border-collapse: collapse; border-spacing: 0; } 28: Line 'em Up!
Line em up Generally speaking, you should strive to line up your elements as best as possible. Take a look at you favorite designs. Did you notice how each heading, icon, paragraph, and logo lines up with something else on the page? Not doing this is one of the biggest signs of a beginner. Think of it this way: If I ask why you placed an element in that spot, you should be able to give me an exact reason.
Advertisement 29: Slice a PSD Slice a PSD Okay, so you've gained a solid grasp of HTML, CSS, and Photoshop. The next step is to convert your first PSD into a working website. Don't worry; it's not as tough as you might think. I can't think of a better way to put your skills to the test. If you need assistance, review these in depth video tutorials that show you exactly how to get the job done.
Slice and Dice that PSD From PSD to HTML/CSS 30: Don't Use a Framework...Yet Frameworks, whether they be for Javascript or CSS are fantastic; but please don't use them when first getting started. Though it could be argued that jQuery and Javascript can be learned simultaneously, the same can't be made for CSS. I've personally promoted the 960 CSS Framework, and use it often. Having said that, if you're still in the process of learning CSS -- meaning the first year -- you'll only make yourself more confused if you use one.
CSS frameworks are for experienced developers who want to save themselves a bit of time. They're not for beginners.
Original article source here : https://code.tutsplus.com/tutorials/30-html-best-practices-for-beginners--net-4957
1 note
·
View note
Text
Jumping Into Webmentions With NextJS (or Not)
Webmention is a W3C recommendation last published on January 12, 2017. And what exactly is a Webmention? It’s described as…
[…] a simple way to notify any URL when you mention it on your site. From the receiver’s perspective, it’s a way to request notifications when other sites mention it.
In a nutshell, it’s a way of letting a website know it has been mentioned somewhere, by someone, in some way. The Webmention spec also describes it as a way for a website to let others know it cited them. What that basically bails down to is that your website is an active social media channel, channeling communication from other channels (e.g. Twitter, Instagram, Mastodon, Facebook, etc.).
How does a site implement Webmentions? In some cases, like WordPress, it’s as trivial as installing a couple of plugins. Other cases may not be quite so simple, but it’s still pretty straightforward. In fact, let’s do that now!
Here’s our plan
Declare an endpoint to receive Webmentions
Process social media interactions to Webmentions
Get those mentions into a website/app
Set the outbound Webmentions
Luckily for us, there are services in place that make things extremely simple. Well, except that third point, but hey, it’s not so bad and I’ll walk through how I did it on my own atila.io site.
My site is a server-side blog that’s pre-rendered and written with NextJS. I have opted to make Webmention requests client-side; therefore, it will work easily in any other React app and with very little refactoring in any other JavaScript application.
Step 1: Declare an endpoint to receive Webmentions
In order to have an endpoint we can use to accept Webmentions, we need to either write the script and add to our own server, or use a service such as Webmention.io (which is what I did).
Webmention.io is free and you only need to confirm ownership over the domain you register. Verification can happen a number of ways. I did it by adding a rel="me" attribute to a link in my website to my social media profiles. It only takes one such link, but I went ahead and did it for all of my accounts.
<a href="https://twitter.com/atilafassina" target="_blank" rel="me noopener noreferrer" > @AtilaFassina </a>
Verifying this way, we also need to make sure there’s a link pointing back to our website in that Twitter profile. Once we’ve done that, we can head back to Webmention.io and add the URL.
This gives us an endpoint for accepting Webmentions! All we need to do now is wire it up as <link> tags in the <head> of our webpages in order to collect those mentions.
<head> <link rel="webmention" href="https://webmention.io/{user}/webmention" /> <link rel="pingback" href="https://webmention.io/{user}/xmlrpc" /> <!-- ... --> </head>
Remember to replace {user} with your Webmention.io username.
Step 2: Process social media interactions into Webmentions
We are ready for the Webmentions to start flowing! But wait, we have a slight problem: nobody actually uses them. I mean, I do, you do, Max Böck does, Swyx does, and… that’s about it. So, now we need to start converting all those juicy social media interactions into Webmentions.
And guess what? There’s an awesome free service for it. Fair warning though: you’d better start loving the IndieWeb because we’re about to get all up in it.
Bridgy connects all our syndicated content and converts them into proper Webmentions so we can consume it. With a SSO, we can get each of our profiles lined up, one by one.
Step 3: Get those mentions into a website/app
Now it’s our turn to do some heavy lifting. Sure, third-party services can handle all our data, but it’s still up to us to use it and display it.
We’re going to break this up into a few stages. First, we’ll get the number of Webmentions. From there, we’ll fetch the mentions themselves. Then we’ll hook that data up to NextJS (but you don’t have to), and display it.
Get the number of mentions
type TMentionsCountResponse = { count: number type: { like: number mention: number reply: number repost: number } }
That is an example of an object we get back from the Webmention.io endpoint. I formatted the response a bit to better suit our needs. I’ll walk through how I did that in just a bit, but here’s the object we will get:
type TMentionsCount = { mentions: number likes: number total: number }
The endpoint is located at:
https://webmention.io/api/count.json?target=${post_url}
The request will not fail without it, but the data won’t come either. Both Max Böck and Swyx combine likes with reposts and mentions with replies. In Twitter, they are analogous.
const getMentionsCount = async (postURL: string): TMentionsCount => { const resp = await fetch( `https://webmention.io/api/count.json?target=${postURL}/` ) const { type, count } = await resp.json()
return { likes: type.like + type.repost, mentions: type.mention + type.reply, total: count, } }
Get the actual mentions
Before getting to the response, please note that the response is paginated, where the endpoint accepts three parameters in the query:
page: the page being requested
per-page: the number of mentions to display on the page
target: the URL where Webmentions are being fetched
Once we hit https://webmention.io/api/mentions and pass the these params, the successful response will be an object with a single key links which is an array of mentions matching the type below:
type TMention = { source: string verified: boolean verified_date: string // date string id: number private: boolean data: { author: { name: string url: string photo: string // url, hosted in webmention.io } url: string name: string content: string // encoded HTML published: string // date string published_ts: number // ms } activity: { type: 'link' | 'reply' | 'repost' | 'like' sentence: string // pure text, shortened sentence_html: string // encoded html } target: string }
The above data is more than enough to show a comment-like section list on our site. Here’s how the fetch request looks in TypeScript:
const getMentions = async ( page: string, postsPerPage: number, postURL: string ): { links: TWebMention[] } => { const resp = await fetch( `https://webmention.io/api/mentions?page=${page}&per-page=${postsPerPage}&target=${postURL}` ) const list = await resp.json() return list.links }
Hook it all up in NextJS
We’re going to work in NextJS for a moment. It’s all good if you aren’t using NextJS or even have a web app. We already have all the data, so those of you not working in NextJS can simply move ahead to Step 4. The rest of us will meet you there.
As of version 9.3.0, NextJS has three different methods for fetching data:
getStaticProps: fetches data on build time
getStaticPaths: specifies dynamic routes to pre-render based on the fetched data
getServerSideProps: fetches data on each request
Now is the moment to decide at which point we will be making the first request for fetching mentions. We can pre-render the data on the server with the first batch of mentions, or we can make the entire thing client-side. I opted to go client-side.
If you’re going client-side as well, I recommend using SWR. It’s a custom hook built by the Vercel team that provides good caching, error and loading states — it and even supports React.Suspense.
Display the Webmention count
Many blogs show the number of comments on a post in two places: at the top of a blog post (like this one) and at the bottom, right above a list of comments. Let’s follow that same pattern for Webmentions.
First off, let’s create a component for the count:
const MentionsCounter = ({ postUrl }) => { const { t } = useTranslation() // Setting a default value for `data` because I don't want a loading state // otherwise you could set: if(!data) return <div>loading...</div> const { data = {}, error } = useSWR(postUrl, getMentionsCount)
if (error) { return <ErrorMessage>{t('common:errorWebmentions')}</ErrorMessage> }
// The default values cover the loading state const { likes = '-', mentions = '-' } = data
return ( <MentionCounter> <li> <Heart title="Likes" /> <CounterData>{Number.isNaN(likes) ? 0 : likes}</CounterData> </li> <li> <Comment title="Mentions" />{' '} <CounterData>{Number.isNaN(mentions) ? 0 : mentions}</CounterData> </li> </MentionCounter> ) }
Thanks to SWR, even though we are using two instances of the WebmentionsCounter component, only one request is made and they both profit from the same cache.
Feel free to peek at my source code to see what’s happening:
WebmentionsCounter (the component)
getMentionsCount (the helper function)
Post layout component (where we’re using the component)
Display the mentions
Now that we have placed the component, it’s time to get all that social juice flowing!
At of the time of this writing, useSWRpages is not documented. Add to that the fact that the webmention.io endpoint doesn’t offer collection information on a response (i.e. no offset or total number of pages), I couldn’t find a way to use SWR here.
So, my current implementation uses a state to keep the current page stored, another state to handle the mentions array, and useEffect to handle the request. The “Load More” button is disabled once the last request brings back an empty array.
const Webmentions = ({ postUrl }) => { const { t } = useTranslation() const [page, setPage] = useState(0) const [mentions, addMentions] = useState([])
useEffect(() => { const fetchMentions = async () => { const olderMentions = await getMentions(page, 50, postUrl) addMentions((mentions) => [...mentions, ...olderMentions]) } fetchMentions() }, [page])
return ( <> {mentions.map((mention, index) => ( <Mention key={mention.data.author.name + index}> <AuthorAvatar src={mention.data.author.photo} lazy /> <MentionContent> <MentionText data={mention.data} activity={mention.activity.type} /> </MentionContent> </Mention> ))} </MentionList> {mentions.length > 0 && ( <MoreButton type="button" onClick={() => { setPage(page + 1) }} > {t('common:more')} </MoreButton> )} </> ) }
The code is simplified to allow focus on the subject of this article. Again, feel free to peek at the full implementation:
Webmention component
getMentions helper
Posts layout component
Step 4: Handling outbound mentions
Thanks to Remy Sharp, handling outbound mentions from one website to others is quite easy and provides an option for each use case or preference possible.
The quickest and easiest way is to head over to Webmention.app, get an API token, and set up a web hook. Now, if you have RSS feed in place, the same thing is just as easy with an IFTT applet, or even a deploy hook.
If you prefer to avoid using yet another third-party service for this feature (which I totally get), Remy has open-sourced a CLI package called wm which can be ran as a postbuild script.
But that’s not enough to handle outbound mentions. In order for our mentions to include more than simply the originating URL, we need to add microformats to our information. Microformats are key because it’s a standardized way for sites to distribute content in a way that Webmention-enabled sites can consume.
At their most basic, microformats are a kind of class-based notations in markup that provide extra semantic meaning to each piece. In the case of a blog post, we will use two kinds of microformats:
h-entry: the post entry
h-card: the author of the post
Most of the required information for h-entry is usually in the header of the page, so the header component may end up looking something like this:
<header class="h-entry"> <!-- the post date and time --> <time datetime="2020-04-22T00:00:00.000Z" class="dt-published"> 2020-04-22 </time> <!-- the post title --> <h1 class="p-name"> Webmentions with NextJS </h1> </header>
And that’s it. If you’re writing in JSX, remember to replace class with className, that datetime is camelCase (dateTime), and that you can use the new Date('2020-04-22').toISOString() function.
It’s pretty similar for h-card. In most cases (like mine), author information is below the article. Here’s how my page’s footer looks:
<footer class="h-card"> <!-- the author name --> <span class="p-author">Atila Fassina</span> <!-- the authot image--> <img alt="Author’s photograph: Atila Fassina" class="u-photo" src="/images/internal-avatar.jpg" lazy /> </footer>
Now, whenever we send an outbound mention from this blog post, it will display the full information to whomever is receiving it.
Wrapping up
I hope this post has helped you getting to know more about Webmentions (or even about IndieWeb as a whole), and perhaps even helped you add this feature to your own website or app. If it did, please consider sharing this post to your network. I will be super grateful!

References
Using Web Mentions on Static Sites (Max Böck)
Client-side Webmentions (Swyx)
Send outgoing Webmentions (Remy Sharp)
Your first webmention (Aaron Parecki)
Further reading
Webmention W3C Specification (Recommendation)
Webmention.io
Webmention.App
Outbound WebMentions CLI
Bridgy
Microformats.org
IndieWeb
The post Jumping Into Webmentions With NextJS (or Not) appeared first on CSS-Tricks.
source https://css-tricks.com/jumping-into-webmentions-with-nextjs-or-not/
from WordPress https://ift.tt/3dt9uOY via IFTTT
0 notes
Text
Common oversights that can impede Google from crawling your content [Video]
youtube
“I don’t know why people are reinventing the wheel,” said Martin Splitt, search developer advocate for Google, during our crawling and indexing session of Live with Search Engine Land. As more and more techniques are developed to provide SEOs and webmasters with flexible solutions to existing problems, Splitt worries that relying on these workarounds, instead of sticking to the basics, can end up hurting a site’s organic visibility.
“We have a working mechanism to do links . . . so, why are we trying to recreate something worse than what we already have built-in?” Splitt said, expressing frustration over how some developers and SEOs are diverging from the standard HTML link in favor of fancier solutions, such as using buttons as links and forsaking the href attribute for onclick handlers. These techniques may create problems for web crawlers, which increases the likelihood that those crawlers skip your links.
Another common issue arises when SEOs and developers block search engines from accessing certain content using the robots.txt file, still expecting their JavaScript API to direct the web crawler. “When you block us from loading that, we don’t see any of your content, so your website, as far as we know, is blank,” Splitt said, adding “And, I wouldn’t know why, as a search engine, would I keep a blank website in my index.”
Why we care. “Oftentimes, people are facing a relatively simple problem and then over-engineer a solution that seems to work, but then actually fails in certain cases and these cases usually involve crawlers,” Splitt said. When simple, widely accepted techniques already exist, site owners should opt for those solutions to ensure that their pages can get crawled and subsequently indexed and ranked. The more complex a workaround is, the higher the chances are that the technique will lead to unforeseen problems down the road.
Want more Live with Search Engine Land? Get it here:
Click here for the full session.
How Google crawls and indexes: a non-technical explanation [Video]
Don’t try to reinvent the SEO wheel, says Google’s Martin Splitt
Is it an algorithm update or is Google adapting to new search intent? [Video]
You can also find a full list of all our Live with Search Engine Land sessions on YouTube.
The post Common oversights that can impede Google from crawling your content [Video] appeared first on Search Engine Land.
Common oversights that can impede Google from crawling your content [Video] published first on https://likesandfollowersclub.weebly.com/
0 notes
Text
Common oversights that can impede Google from crawling your content [Video]
youtube
“I don’t know why people are reinventing the wheel,” said Martin Splitt, search developer advocate for Google, during our crawling and indexing session of Live with Search Engine Land. As more and more techniques are developed to provide SEOs and webmasters with flexible solutions to existing problems, Splitt worries that relying on these workarounds, instead of sticking to the basics, can end up hurting a site’s organic visibility.
“We have a working mechanism to do links . . . so, why are we trying to recreate something worse than what we already have built-in?” Splitt said, expressing frustration over how some developers and SEOs are diverging from the standard HTML link in favor of fancier solutions, such as using buttons as links and forsaking the href attribute for onclick handlers. These techniques may create problems for web crawlers, which increases the likelihood that those crawlers skip your links.
Another common issue arises when SEOs and developers block search engines from accessing certain content using the robots.txt file, still expecting their JavaScript API to direct the web crawler. “When you block us from loading that, we don’t see any of your content, so your website, as far as we know, is blank,” Splitt said, adding “And, I wouldn’t know why, as a search engine, would I keep a blank website in my index.”
Why we care. “Oftentimes, people are facing a relatively simple problem and then over-engineer a solution that seems to work, but then actually fails in certain cases and these cases usually involve crawlers,” Splitt said. When simple, widely accepted techniques already exist, site owners should opt for those solutions to ensure that their pages can get crawled and subsequently indexed and ranked. The more complex a workaround is, the higher the chances are that the technique will lead to unforeseen problems down the road.
Want more Live with Search Engine Land? Get it here:
Click here for the full session.
How Google crawls and indexes: a non-technical explanation [Video]
Don’t try to reinvent the SEO wheel, says Google’s Martin Splitt
Is it an algorithm update or is Google adapting to new search intent? [Video]
You can also find a full list of all our Live with Search Engine Land sessions on YouTube.
The post Common oversights that can impede Google from crawling your content [Video] appeared first on Search Engine Land.
Common oversights that can impede Google from crawling your content [Video] published first on https://likesfollowersclub.tumblr.com/
0 notes
Link
In this post, we’ll look at several different ways you can build reusable React components that leverage Tailwind under the hood while exposing a nice interface to other components. This will improve your code by moving from long lists of class names to semantic props that are easier to read and maintain. You will need to have worked with React in order to get a good understanding of this post. Tailwind is a very popular CSS framework that provides low-level utility classes to help developers build custom designs. It’s grown in popularity over the last few years because it solves two problems really well:
Tailwind makes it easy to make iterative changes to HTML without digging through stylesheets to find matching CSS selectors.
Tailwind has sane conventions and defaults. This makes it easy for people to get started without writing CSS from scratch.
Add the comprehensive documentation and it’s no surprise why Tailwind is so popular. These methods will help you transform code that looks like this:
<button className="bg-blue-500 hover:bg-blue-700 text-white font-bold py-2 px-4 rounded"> Enable </button>
To code that looks like this:
<Button size="sm" textColor="white" bgColor="blue-500"> Enable </Button>
The difference between both snippets is that in the first we made use of a standard HTML button tag, while the second used a <Button> component. The <Button> component had been built for reusability and is easier to read since it has better semantics. Instead of a long list of class names, it uses properties to set various attributes such as size, textColor, and bgColor. Let’s get started.
Method 1: Controlling Classes With The Classnames Module
A simple way to adapt Tailwind into a React application is to embrace the class names and toggle them programmatically. The classnames npm module makes it easy to toggle classes in React. To demonstrate how you may use this, let’s take a use case where you have <Button> components in your React application.
// This could be hard to read. <button className="bg-blue-500 hover:bg-blue-700 text-white font-bold py-2 px-4 rounded">Enable</button> // This is more conventional React. <Button size="sm" textColor="white" bgColor="blue-500">Enable</Button>
Let’s see how to separate Tailwind classes so people using this <Button> component can use React props such as size, textColor, and bgColor.
Pass props such as bgColor and textColor directly into the class name string template.
Use objects to programmatically switch class names (as we have done with the size prop)
In the example code below, we’ll take a look at both approaches.
// Button.jsx import classnames from 'classnames'; function Button ({size, bgColor, textColor, children}) { return ( <button className={classnames("bg-${bgColor} text-${textColor} font-bold py-2 px-4 rounded", { "text-xs": size === 'sm' "text-xl": size === 'lg', })}> {children} </button> ) }; export default Button;
In the code above, we define a Button component that takes the following props:
size Defines the size of the button and applies the Tailwind classes text-xs or text-xl
bgColor Defines the background color of the button and applies the Tailwind bg-* classes.
textColor Defines the text color of the button and applies the Tailwind text-* classes.
children Any subcomponents will be passed through here. It will usually contain the text within the <Button>.
By defining Button.jsx, we can now import it in and use React props instead of class names. This makes our code easier to read and reuse.
import Button from './Button'; <Button size="sm" textColor="white" bgColor="blue-500">Enable</Button>
Using Class Names For Interactive Components
A Button is a very simple use-case. What about something more complicated? Well, you can take this further to make interactive components. For example, let’s look at a dropdown that is made using Tailwind.
Your browser does not support the video tag.
An interactive dropdown built using Tailwind and class name toggling. For this example, we create the HTML component using Tailwind CSS classnames but we expose a React component that looks like this:
<Dropdown options={\["Edit", "Duplicate", "Archive", "Move", "Delete"\]} onOptionSelect={(option) => { console.log("Selected Option", option)} } />
Looking at the code above, you’ll notice that we don’t have any Tailwind classes. They are all hidden inside the implementation code of <Dropdown/>. The user of this Dropdown component just has to provide a list of options and a click handler, onOptionSelect when an option is clicked. Let’s see how this component can be built using Tailwind. Removing some of the unrelated code, here’s the crux of the logic. You can view this Codepen for a complete example.
import classNames from 'classnames'; function Dropdown({ options, onOptionSelect }) { // Keep track of whether the dropdown is open or not. const [isActive, setActive] = useState(false); const buttonClasses = `inline-flex justify-center w-full rounded-md border border-gray-300 px-4 py-2 bg-white text-sm leading-5 font-medium text-gray-700 hover:text-gray-500 focus:outline-none focus:border-blue-300 focus:shadow-outline-blue active:bg-blue-500 active:text-gray-200 transition ease-in-out duration-150`; return ( // Toggle the dropdown if the button is clicked <button onClick={() => setActive(!isActive)} className={buttonClasses}> Options </button> // Use the classnames module to toggle the Tailwind .block and .hidden classes <div class={classNames("origin-top-right absolute right-0 mt-2 w-56 rounded-md shadow-lg", { block: isActive, hidden: !isActive })}> // List items are rendered here. {options.map((option) => <div key={option} onClick={(e) => onOptionSelect(option)}>{option}</div>)} </div> ) } export default Dropdown;
The dropdown is made interactive by selectively showing or hiding it using the .hidden and .block classes. Whenever the <button> is pressed, we fire the onClick handler that toggles the isActive state. If the button is active (isActive === true), we set the block class. Otherwise, we set the hidden class. These are both Tailwind classes for toggling display behavior. In summary, the classnames module is a simple and effective way to programmatically control class names for Tailwind. It makes it easier to separate logic into React props, which makes your components easier to reuse. It works for simple and interactive components.
Method 2: Using Constants To Define A Design System
Another way of using Tailwind and React together is by using constants and mapping props to a specific constant. This is effective for building design systems. Let’s demonstrate with an example. Start with a theme.js file where you list out your design system.
// theme.js (you can call it whatever you want) export const ButtonType = { primary: "bg-blue-500 hover:bg-blue-700 text-white font-bold rounded", secondary: "bg-blue-500 hover:bg-blue-700 text-white font-bold rounded", basic: "bg-white hover:bg-gray-700 text-gray-700 font-bold rounded", delete: "bg-red-300 hover:bg-red-500 text-white font-bold rounded" }; export const ButtonSize = { sm: "py-2 px-4 text-xs", lg: "py-3 px-6 text-lg" }
In this case, we have two sets of constants:
ButtonType defines how buttons are styled in our app.
ButtonSizes defines the sizes of buttons in our app.
Now, let’s write our <Button> component:
import {ButtonType, ButtonSize} from './theme'; function Button({size, type, children}) { // This can be improved. I’m keeping it simple here by joining two strings. const classNames = ButtonType[type] + " " + ButtonSize[size]; return ( <button className={classNames}>{children}</button> ) } export default Button;
We use the ButtonType and ButtonSize constants to create a list of class names. This makes the interface of our <Button> much nicer. It lets us use size and type props instead of putting everything in a class name string.
// Cleaner and well defined props. <Button size="xs" type="primary">Enable</Button>
Versus the prior approach:
// Exposing class names <button className="py-2 px-4 text-xs bg-blue-500 hover:bg-blue-700 text-white font-bold rounded">Enable</button>
If you need to redefine how buttons look in your application, just edit the theme.js file and all buttons in your app will automatically update. This can be easier than searching for class names in various components.
Method 3: Composing Utilities With @apply
A third way to improve the legibility of your React components is using CSS and the @apply pattern available in PostCSS to extract repeated classes. This pattern involves using stylesheets and post-processors. Let’s demonstrate how this works through an example. Suppose you have a Button group that has a Primary and a Secondary Button.

A Button Group consisting of a primary and secondary button. (Large preview)
<button className="py-2 px-4 mr-4 text-xs bg-blue-500 hover:bg-blue-700 text-white font-bold rounded">Update Now</button> <button className="py-2 px-4 text-xs mr-4 hover:bg-gray-100 text-gray-700 border-gray-300 border font-bold rounded">Later</button>
Using the @apply pattern, you can write this HTML as:
<button className="btn btn-primary btn-xs">Update Now</button> <button className="btn btn-secondary btn-xs">Later</button>
Which can then be adopted to React to become:
import classnames from "classnames"; function Button ({size, type, children}) { const bSize = "btn-" + size; const bType = "btn-" + type; return ( <button className={classnames("btn", bSize, bType)}>{children}</button> ) } Button.propTypes = { size: PropTypes.oneOf(['xs, xl']), type: PropTypes.oneOf(['primary', 'secondary']) }; // Using the Button component. <Button type="primary" size="xs">Update Now</Button> <Button type="secondary" size="xs">Later</Button>
Here’s how you would create these BEM-style classnames such as .btn, .btn-primary, and others. Start by creating a button.css file:
/\* button.css \*/ @tailwind base; @tailwind components; .btn { @apply py-2 px-4 mr-4 font-bold rounded; } .btn-primary { @apply bg-blue-500 hover:bg-blue-700 text-white; } .btn-secondary { @apply hover:bg-gray-700 text-gray-700 border-gray-300 border; } .btn-xs { @apply text-xs; } .btn-xl { @apply text-xl; } @tailwind utilities;
The code above isn’t real CSS but it will get compiled by PostCSS. There’s a GitHub repository available here which shows how to setup PostCSS and Tailwind for a JavaScript project. There’s also a short video that demonstrates how to set it up here.
Disadvantages Of Using @apply
The concept of extracting Tailwind utility classes into higher-level CSS classes seems like it makes sense, but it has some disadvantages which you should be aware of. Let’s highlight these with another example. First, by extracting these class names out, we lose some information. For example, we need to be aware that .btn-primary has to be added to a component that already has .btn applied to it. Also, .btn-primary and .btn-secondary can’t be applied together. This information is not evident by just looking at the classes. If this component was something more complicated, you would also need to understand the parent-child relationship between the classes. In a way, this is the problem that Tailwind was designed to solve, and by using @apply, we are bringing the problems back, in a different way. Here’s a video where Adam Wathan — the creator of Tailwind — dives into the pros and cons of using @apply.
Summary
In this article, we looked at three ways that you can integrate Tailwind into a React application to build reusable components. These methods help you to build React components that have a cleaner interface using props.
Use the classnames module to programmatically toggle classes.
Define a constants file where you define a list of classes per component state.
Use @apply to extract higher-level CSS classes.
0 notes
Text
HTML là gì? Các thành phần quan trọng của HTML?

HTML không phải là ngôn ngữ lập trình, đồng nghĩa với việc nó không thể tạo ra các chức năng “động” giống như các ngôn ngữ lập trình khác được. Nó giống như Microsoft Word nhưng dùng để bố cục và định dạng các trang của website. Vậy thì HTML là gì? HTML có những thành phần quan trọng nào? Và cách ứng dụng của nó ra sao? Hãy cùng Top On Seek tìm hiểu qua bài viết sau nhé!
Các phần tử của HTML ( HTML Elements )
HTML là chữ viết tắt của Hypertext Markup Language ( Ngôn ngữ đánh dấu siêu văn bản). Nó giúp người dùng tạo và cấu trúc các thành phần trong trang web hoặc ứng dụng, phân chia các đoạn văn, heading, links,.... Cùng đi vào tìm hiểu các phần tử của nó nào!
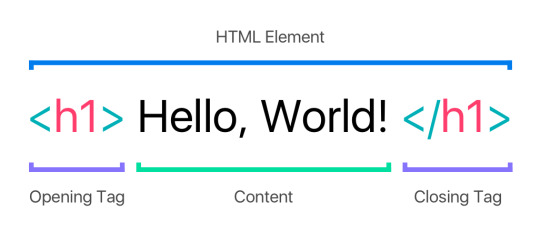
Phần tử HTML hay còn được biết đến với tên Tag hay Entity hay thẻ. HTML là ngôn ngữ đánh dấu (markup-language) do đó có thể hiểu một phần tử HTML chính là một văn bản được đánh dấu để thể hiện theo một cách nào đó. Một phần tử HTML thường được xác định dựa trên ba thành phần: Thẻ mởNội dung nằm bên trong cặp thẻ (hay còn được gọi là nội dung của phần tử)Thẻ đóng Thẻ mởNội dung phần tửThẻ đóng<h1>This is a Heading</h1><p>This is paragraph.</p>
Các thuộc tính phần tử của HTML ( HTML Attributes)

Thuộc tính phần tử HTML được sử dụng để bổ sung thông tin cho phần tử. Có thể tóm gọn về thuộc tính phần tử HTML đơn giản như sau: Các phần tử HTML có thể có các thuộc tínhCác thuộc tính cung cấp thêm thông tin về phần tửCác thuộc tính có các cặp tên / giá trị như charset = "utf-8" Ví dụ về một trang HTML đơn giản như sau: <!DOCTYPE html> <html lang="en"> <meta charset="utf-8"> <title>Page Title</title> <body> <h1>This is a Heading</h1> <p>This is a paragraph.</p> <p>This is another paragraph.</p> </body> </html> Giải thích ví dụ trên: Các phần tử HTML là các khối xây dựng của các trang HTML. Khai báo <!DOCTYPE html> định nghĩa trang này là HTML5Phần tử <html> là phần tử gốc của một trang HTMLThuộc tính lang định nghĩa ngôn ngữ của trangPhần tử <meta> chứa thông tin meta của trangThuộc tính charset xác định bộ ký tự sử dụng trong trangPhần tử <title> chỉ định tiêu đề của trangPhần tử <body> chứa nội dung mà trang hiển thịPhần tử <h1> định nghĩa tiêu đề lớnPhần tử <p> định nghĩa đoạn văn Tất cả các trang HTML phải bắt đầu bằng khai báo: <! DOCTYPE html>. Bản thân trang HTML đó cũng phải bắt đầu bằng <html> và kết thúc bằng </html>. Phần nội dung hiển thị của trang HTML nằm giữa 2 tag <body> và </body>.
Cấu trúc của một trang HTML
Hình ảnh dưới đây sẽ cho bạn thấy cấu trúc của một trang HTML là gì? Nó trông ra sao.
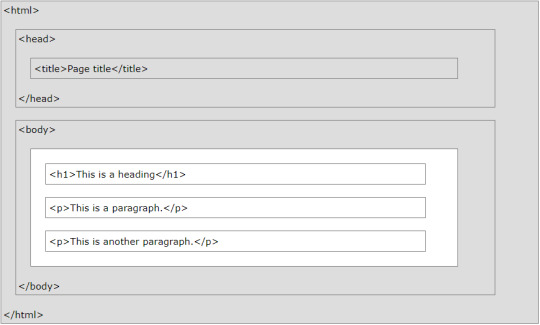
Phần màu trắng chính là phần nội dung sẽ hiển thị ra cho người dùng nhìn thấy.
Các phần tử trong một trang HTML được biểu diễn ra sao?
1. Tiêu đề

Các tiêu đề HTML được định nghĩa bằng các thẻ heading từ <h1> cho đến <h6>. Thẻ <h1> chính là tiêu đề quan trọng nhất. <h6> xác định tiêu đề ít quan trọng nhất: <h1>This is heading 1</h1> <h2>This is heading 2</h2> <h3>This is heading 3</h3> 2. Đoạn văn bản
Đoạn văn bản trong HTML được định nghĩa trong thẻ <p> <p>This is a paragraph.</p> <p>This is another paragraph.</p> 3. Liên kết Các liên kết HTML được định nghĩa trong thẻ <a> <a href="https://www.w3schools.com">This is a link</a> Điểm đến của liên kết đó nằm trong thuộc tính href 4. Hình ảnh Hình ảnh HTML được định dạng bằng thẻ <img>. Tệp nguồn (src), văn bản thay thế (alt), chiều rộng và chiều cao được cung cấp dưới dạng các thuộc tính: <img src="img_w3schools.jpg" alt="W3Schools" style="width:120px;height:150px"> 5. Nút click Các nút click được định nghĩa trong các thẻ <button> <button>Click me</button> 6. Danh sách Danh sách trong HTML được xác định bằng các thẻ <ul> (danh sách không có thứ tự / dấu đầu dòng) hoặc thẻ <ol> (danh sách được sắp xếp / đánh số), theo sau là thẻ <li> (danh sách các mục): <ul> <li>Coffee</li> <li>Tea</li> <li>Milk</li> </ul> 7. Bảng Các bảng trong HTML được xác định bằng thẻ <table>. Các hàng của bảng được xác định bằng thẻ <tr>. Tiêu đề bảng được xác định bằng thẻ <th>. (in đậm mặc định). Các ô của bảng (dữ liệu) được xác định bằng thẻ <td>. <table> <tr> <th>Firstname</th> <th>Lastname</th> <th>Age</th> </tr> <tr> <td>Jill</td> <td>Smith</td> <td>50</td> </tr> <tr> <td>Eve</td> <td>Jackson</td> <td>94</td> </tr> </table>
Lập trình HTML
Mọi phần tử của HTML đều có thể có các thuộc tính. Trong lập trình web, các thuộc tính quan trọng nhất là id và class. Thuộc tínhVí dụid<table id="table01">class<p class="normal">style<p style="font-size:16px">data-<div data-id="500">onclick<input onclick="myFunction()">onmouseover<a onmouseover="this.setAttribute('style','color:red')"> Qua bài viết trên hy vọng bạn đã có thể trả lời cho mình được những câu hỏi đơn giản như HTML là gì? HTML có những thành phần nào? Và cách sử dụng của chúng ra sao? Cùng theo dõi các bài viết khác của Top On Seek để bổ sung thêm nhiều kiến thức hữu ích khác nữa nhé! Nguồn: w3schools.com Read the full article
0 notes
Text
Learn React Basics in 10 Minutes
If you want to learn the basics of React in the time it takes you to drink a cup of coffee, this post is for you.
This article aims to provide a beginner-friendly introduction to React, what it is and why we need it. It assumes you have some understanding of basic JavaScript.
We will discuss some of its basic concepts and go over what you can build with React.
We will also discuss some code but the overall goal is to gain an intuitive understanding of what React is all about so that you get comfortable with the basics.
What is React?
Developed by Facebook in 2011, React has quickly become one of the most widely used JavaScript libraries. According to HackerRank, 30% of employers look for developers who know React but only about half of the applicants actually have the required knowledge.
Clearly, React is in high demand in the job market.
So what exactly is React?
React is an efficient and flexible JavaScript library for building user interfaces (with itself written using JavaScript). It breaks down complex UIs in the form of small, isolated code called “components”. By using these components, React only concerns itself with what you see on the front page of a website.

A calculator app that can be split into React components.
Components are independent and reusable. They can either be Javascript functions or classes. Either way, they both return a piece of code that represents part of a web page.
Here’s an example of a function component that renders a <h2> element onto the page:
function Name() { return <h2>Hi, my name is Joe!</h2>; }
And here is a class component doing the same rendering:
class Person extends React.Component { render() { return <h2>Hi again from Joe!</h2>; } }
Using a class component takes slightly more effort in that you have to extend React.Component (part of the React library) while a function component is mostly plain JavaScript. However, class components provide certain critical functionalities that function components lack (see Functional vs Class-Components in React).
You may have noticed that there is a strange mixture of HTML and JavaScript inside each component. React actually uses a language called JSX that allows HTML to be mixed with Javascript.
Not only can you use JSX to return pre-defined HTML elements, you can also create your own. For example, instead of rendering <h2> elements directly in the class component, you can render the functional component which returns the same thing:
class Person extends React.Component { render() { return <Name />; } }
Note the self-closing ‘/>’ of the component.
The power of React starts to become more evident as you can imagine rendering many simple components to form a more complex one.
To build a page, we can call these components in a certain order, use the results they return, and display them to the user.
Why Choose React Over Vanilla JavaScript?
Being able to break down complex UIs through the use of components obviously gives React an edge over vanilla JavaScript (plain JS without any external libraries or frameworks), but what else can React do that places it in such high demand among employers?
Let’s take a look at the differences between how React and vanilla JS handles things.
In the previous section, we discussed how React uses components to render UIs. We did not delve into what was happening on the HTML side of things. It may be surprising to learn that the HTML code that pairs with React is really simple:
<div id="root"></div>
It is usually just a <div> element with an id that serves as a container for a React app. When React renders its components, it will look for this id to render to. The page is empty before this rendering.
Vanilla JS on the other hand defines the initial UI right in the HTML.
In addition, vanilla JS takes care of functionality while HTML takes care of displaying content (markup).
In the earlier days of the web the separation of functionality and markup sounded logical as apps were simpler. However, as complexity grew so do the headaches of maintaining large pieces of JS code.
JS code that updates a piece of HTML can be spread across several files, and the developers may have a hard time keeping track of where the code came from. They have to keep things straight in their heads of all the interactions between the code that resides in different files.
React sorts the code into components, where each component maintains all the code needed to both display and update the UI.
Updating the UI requires updating the DOM, or document object model (see DOM Manipulation Using JavaScript). This is where React truly shines.
If you want to access the DOM in vanilla JS, you have to first find it before it can be used. React stores the data in regular JS variables and maintains its own virtual DOM.
If you want to then update the DOM in vanilla JS, you have to locate the appropriate node then manually append or remove elements. React automatically updates the UI based on the application state, which we will discuss in more detail in the next section.
So the primary reason why we may want to use React over vanilla JS can be summarized in one word: simplicity.
With vanilla JS, it’s easy to get lost in a maze of DOM searches and updates. React forces you to break down your app into components which produces more maintainable code.
Thus, for complex apps you will definitely want to learn React.
Basic React Concepts
We have already discussed how React uses components to break down complex UIs and JSX to render those components.
In this section we will talk about some more fundamental concepts of React.
State
As mentioned previously, React updates the UI based on the application state. This state is actually stored as a property of a React class component:
class Counter extends React.Component { state = { value: 0 }; }
Suppose we have a counter and 2 buttons that either increment or decrement. The value of the counter is rendered onto the page through JSX.
The display counter value is based on the state and we change the state by clicking one of the buttons. Vanilla JS treats a button click as an event and so does React. When such an event occurs, we will call functions that either increment or decrement the counter based on the button clicked. These functions have the code that changes the component state.
Here’s an example of such a counter:
class Counter extends React.Component { state = { value: 0 }; handleIncrement= () => { this.setState(state => { value: state.value + 1 }); }; handleDecrement= () => { this.setState(state => { value: state.value - 1 }); }; render() { return ( <div> <h2>{this.state.value}</h2> <button onClick={this.handleDecrement}>Decrement</button> <button onClick={this.handleIncrement}>Increment</button> </div> ); } };
We updated the state by calling setState in each of the functions handling a button click. The counter displayed on the page will update in real time. Thus, React gets its name because it reacts to state changes.
In short, React automatically monitors every component state for changes and updates the DOM appropriately.
Props
We can use props (short for "properties") to allow components to talk to each other.
Suppose the counter in our previous example represents the quantity of a product a customer wishes to purchase. The store wants to place a limit of 2 products purchased per customer. At checkout, we want to display an appropriate message if the customer tries to purchase more than 2.
Here’s how we may do it with props:
const Display = (props) => { let message; if(props.number>2){ message = ‘You’re limited to purchasing 2 max!’; }else{ message = ‘All’s good.’; } return( <p>message</p> ); }; class Timer extends React.Component { state = { quantity: 0 } //...code for handling button clicking, updating state, etc. render(){ return( <Display number = {this.state.quantity} /> //...code for other components ); } };
We create a functional component called Display and pass props as a parameter. When we render this component, we pass to it number as an attribute set to the quantity of the product a customer wants to purchase. This is similar to setting an attribute of an HTML tag. We call this value with props.number in Display to determine what message to return.
Component Lifecycle
As React updates the DOM based on component states, special methods called lifecycle methods exist to provide opportunities to perform actions at specific points in the lifecycle of a component.
They allow you to catch components at a certain point in time to call appropriate functions. These points of time can be before components are rendered, after they are updated, etc. You may want to explore a component’s lifecycle methods.
To see lifecycle methods in action, you can check out this Pomodoro Clock I made.
The clock timer is initially set to the session length. When the session timer counts down to zero, the timer needs to switch to the break length and start counting down from there.
Since the timer is a component, I used the lifecycle method componentDidUpdate within my main class component to handle any changes with handleChange():
componentDidUpdate() { this.handleChange(); }
You can think of lifecycle methods as adding event listeners in vanilla JS to a React component.
What Can You Build with React?
So now you have a basic understanding of React, what can you build with it?
We already mentioned in the beginning of this post that Facebook developed React in 2011, so naturally the Facebook platform is based on React. Other famous apps that either completely or partially use React include Instagram, Netflix, and Whatsapp.
But as beginners of React, we are not looking to immediately build the next Facebook so here’s a list of 10 React Starter Project Ideas to Get You Coding.
If you want to learn more about web development and check out some examples of beginner-friendly React projects, visit my blog at 1000 Mile World.
Thanks for reading and happy coding!
via freeCodeCamp.org https://ift.tt/2UicncL
0 notes
Link
Web components are a new set of APIs built on web standards that are widely adopted by browsers (see browser support at webcomponents.org). They allow developers to make flexible custom components–but with that flexibility comes responsibility. In this two-part blog, we will outline what web components are and the specific accessibility considerations they have, so you can integrate web components into your own products with all users in mind. Web Components Web components allow developers to make their own custom components with native HTML and JavaScript. They are built of three parts: Custom elements HTML templates Shadow DOM Salesforce’s Lightning Web Components (LWC) component framework is built on top of web components to make it easy to create fast, lightweight components. Let’s explore an example web component to see how we can best leverage them. Custom Elements This is the custom tag itself, which extends either an existing tag (like HTMLButton) or the base HTMLElement. For my example component, I am going to extend the base HTML element. I have to define the custom element for the browser and connect it to the CustomButton class I made (live finished CustomButton). class CustomButton extends HTMLElement { constructor() { super(); } } window.customElements.define('custom-button', CustomButton); Right now, I have this awesome new tag , but it doesn’t have anything inside of it and it can’t do anything. There are a couple ways to build this component. I could add functionality directly to the custom tag, but in this example I will use HTML templates. HTML Templates There are two ways to create reusable snippets of HTML: and elements. Templates Templates have display=”none” by default and can be referenced with JavaScript, which makes them good for HTML that will be reused in your component. Looking at the CustomButton, using a template makes sense for now. I don’t need a lot of flexibility since it is just a button that developers can pass a custom string to. To begin building my component, I add a template tag in the DOM (Document Object Model) and add a button inside of it. Then, in the constructor I append the contents of the template to the custom element itself. `; class CustomButton extends HTMLElement { constructor() { super(); this.appendChild(myTemplate.content.cloneNode(true)); this.button = this.querySelector('button'); this.updateText = this.updateText.bind(this); } connectedCallback() { if (this.hasAttribute('text') this.updateText(); } updateText() { let buttonSpan = this.button.querySelector('span'); buttonSpan.innerText = this.getAttribute('text'); } } window.customElements.define('custom-button', CustomButton); My button template has a span inside of it with default text that the user can then replace by passing a string to the custom element with the text attribute. I also added a connectedCallback function, which is a web component lifecycle function that happens when the component is connected to the DOM. In that function I set the innerText of the button to the value passed from the custom component. I can use the CustomButton in my HTML like this: So now, if I use my CustomButton component, the browser DOM will look like this: Slots Slots allow flexibility, since they let you put anything within them. This is especially useful if you need to allow consumers of your component to add custom HTML. One thing to keep in mind is that slots require that shadow DOM is enabled to work correctly. For my CustomButton component, people might want to add an icon – so I can use a slot! I update the contents of the template to be: Someone using my button can add any icon in their HTML: Which, if shadow DOM is enabled, the browser will render as: For more on the differences between the two, check out Mozilla’s article on templates and slots. Since I have to use shadow DOM for the icon slot, the next step is to look into what the shadow DOM is and how it works. Shadow DOM Up until this point, when I talk about the DOM, it is the main DOM that the browser generates – which is also called the light DOM. If you view the page source of a site, you can see the light DOM, every HTML element on the page. The shadow DOM is a scoped document object model tree that is only within your custom element. If shadow DOM is enabled in your component, the component’s elements are in a separate tree from the rest of the page. No Shadow vs Open vs Closed Web components don’t need to have shadow DOM enabled, but if it is enabled, it can either be open or closed. If shadow DOM is not enabled: the component is in the main DOM. JavaScript and CSS on the page can affect the contents of the component. If the shadow DOM is open: the main DOM can’t access the sub tree in the traditional ways, but you can still access the sub tree with Element.shadowRoot. document.getElementById, other query selectors, and CSS from outside the component will not affect it. If the shadow DOM is closed: the main DOM cannot access the elements inside of the component at all. JavaScript and CSS from outside the component will not affect it. There are very few instances where having a fully closed shadow is necessary and the current industry standard is to use open shadow. To look at the source code for the CustomButton example, I enable the open shadow DOM like this: `; class CustomButton extends HTMLElement { constructor() { super(); let shadowRoot = this.attachShadow({ 'mode': 'open' }); shadowRoot.appendChild(myTemplate.content.cloneNode(true)); } } window.customElements.define('custom-button', CustomButton); The contents of the template are now added to the shadow root, not directly to the custom element. Finishing the Custom Button The HTML is the way I want it to be, so it is time to make the CustomButton interactive. When people click the button, I want to toggle the aria-pressed attribute so users know if it is pressed. `; class CustomButton extends HTMLElement { constructor() { super(); let shadowRoot = this.attachShadow({ 'mode': 'open' }); shadowRoot.appendChild(myTemplate.content.cloneNode(true)); this.button = this.shadowRoot.querySelector('button'); this.handleClick = this.handleClick.bind(this); this.updateText = this.updateText.bind(this); } get ariaPressed() { const value = this.button.getAttribute('aria-pressed'); return (value === 'true'); } set ariaPressed(value) { this.button.setAttribute('aria-pressed', value); } connectedCallback() { this.button.addEventListener('click', this.handleClick); if (this.hasAttribute('text')) this.updateText(); } handleClick() { this.ariaPressed = !this.ariaPressed; } updateText() { let buttonSpan = this.button.querySelector('span'); buttonSpan.innerText = this.getAttribute('text'); } } window.customElements.define('custom-button', CustomButton); Live version This is the final code for my CustomButton, I have added a couple functions: get ariaPressed: returns the value of the aria-pressed attribute on the button inside the custom-button element set ariaPressed: sets the value of the aria-pressed attribute on the button inside the custom-button element. connectedCallback: adds an onClick listener when the component connects to the DOM. handleClick: toggles the value of ariaPressed when the button is clicked Now, I can add my custom button to my HTML like this: And I can programatically set the ariaPressed property like this: document.getElementById('important-button').ariaPressed = true; Conclusion We now have a button component with a property called ariaPressed that can be set with JavaScript. The component combines custom elements, HTML templates, and shadow DOM all with plain JavaScript and HTML, no frameworks required! In part two, I will cover the accessibility concerns related to web components. Resources webcomponents.org Lightning Web Components Mozilla: Using Templates and Slots Mozilla: Web Components Google: Shadow DOM v1 About the Author Lee White is an accessibility engineer at Salesforce, where she focuses on Lightning Platform accessibility. You can follow her on Twitter @shleewhite.
0 notes